What is Sharepoint?
Sharepoint is the platform where different kinds of people or differenet
roles of people can sharedata, collaborate and customize as per the
requirement.


It is central enterprise information portal where organization's different people could share their documents, works and various project related information with their colleagues.


History and Versions in SharePoint:
SharePoint came in Two Main flavors (1) MOSS (2) MS SharePoint 2010 Server.
MOSS:


Hardware and Software requirement:

Create demo SharePoint site in SharePoint Portal in below format

Solution For SharePoint Readers....
What is MS SharePoint 2010:
SharePoint
allows people to create websites with different content and different purposes.
Its many built-in features and components make it a comprehensive solution that
can fit many needs. One common use
of SharePoint in organizations is to create sites that are used for team
collaboration. These collaborative sites, also known as team sites or group
work sites, enable team members to better work with one another. They can
use the site to share documents, assign tasks, track team events on a shared
web calendar, and much more. This use is known as a team collaboration
system.
Many companies
use SharePoint for their central document storage, replacing network folders.
This use is known as an electronic document management system.Another common
use is as a corporate portal where the corporate employees can go and download
forms, read corporate news, fill in surveys, and search for documents. This use
is known as an electronic content management system or
an intranet.
Finally, some
companies choose the SharePoint platform as the platform for their Internet
sites—where visitors from around the world can visit the company’s website and
read about the company’s products, register for events, and do whatever it is
the site has been configured to allow them to do. This use is known as a web
content management system.
This variety of
possible uses of SharePoint indicate the flexibility of the SharePoint
platform. It is highly customizable—which means that one SharePoint site may look entirely different from another SharePoint site. This book shows mostly basic SharePoint sites (sites that have not
been customized), and the sites that you will be using may look significantly
different.
Difference Between SPF and SharePoint Server:
SharePoint Server has many more features related to business intelligence and business processes and forms. SharePoint Server has a publishing feature that enables site managers to create publishing sites where it is easy to author pages (as opposed to documents) and publish them using workflows. This is very important for large corporations that want to, for example, publish corporate news using an approval workflow or build an Internet site where every page must go through a special approval process.
Difference Between SPF and SharePoint Server:
SharePoint Server is an extension of SPF.
SharePoint Server sites have features that are not available in SPF sites, and
they enjoy all the features of SPF sites.
SPF sites work well for collaboration sites.
Such a site gives groups of people the ability to upload and download
documents, use discussion boards, assign tasks, share events, and use
workflows. However, SPF does not have enough features to be a good platform for
a corporate portal or for a corporate search solution. SharePoint Server offers
extra features that upgrade SPF into a platform that can serve a corporation
with enterprise searching (searching from one location across all the sites
that corporate has and on documents and external systems that are stored in
other locations, not just in SharePoint). It also has features for storing
details about people and searching on them, and it enables employees to have
their own personal sites where they can store documents (instead of on their
machines). SharePoint Server has many more features related to business intelligence and business processes and forms. SharePoint Server has a publishing feature that enables site managers to create publishing sites where it is easy to author pages (as opposed to documents) and publish them using workflows. This is very important for large corporations that want to, for example, publish corporate news using an approval workflow or build an Internet site where every page must go through a special approval process.
What Is Microsoft FAST Search?
FAST is an optional
component of SharePoint Server that an organization can have installed on top
of SharePoint. It adds further intelligence to the regular SharePoint search
experience by enhancing the search options and how the search results are
returned. If FAST is installed on a SharePoint site, you see more options than
you would normally get in SharePoint. Chapter
4, “Searching in SharePoint,”
provides some examples of these options.
How to Tell Whether a Site Is Based on SPF or SharePoint Server
There is no way to tell
just by looking whether a site is hosted on a server that has SharePoint Server
installed. Customizations that a company might have developed may cause an SPF
site to look as if it has some extensions that come with SharePoint Server. On
the other hand, customizations can cause a SharePoint Server site to look
simpler; for example, it might remove the SharePoint Server–specific links that
help identify a site as a SharePoint Server site.
However,
there is one thing you can look for in most SharePoint sites to determine with
a fair degree of certainty whether a site is SharePoint Server or SPF: You can
look for the My Site link under the name
drop-down at the top of the screen. If you see that link, you are viewing a site that is running on
a server with SharePoint Server. Not having the link does not necessarily mean
that the site does not have SharePoint Server, however, because the
administrator can choose to disable that functionality.
What Is a Site?
The structure of
SharePoint sites (sometimes referred to as webs) is very different from the
structure of typical Internet sites that contain only pages. In SharePoint, a
site can house more than just pages. It is a container that holds lists and
libraries (discussed later in this chapter), and it can have other sites under
it.
For example, a
corporate portal might have a home site called SharePoint Intranet that
contains information that people see when they browse to that site. That portal
also might have a subsite called Human Resources that stores forms such as
travel requests, expense claims, and other forms. The two sites are linked
because the Human Resources site is under the SharePoint Intranet site. The two
sites may share some attributes, such as security (who is allowed to do what in
the sites) and navigation (so that visitors to the sites can navigate between
the sites), but they have separate contents.
Every SharePoint
site is a member of a site collection. As the name implies, a site collection
is a collection of sites. Every site collection has a single site as its root
site, and other sites can be built under the root site. A site collection has
some attributes that are common to all the sites in that collection (for
example, some search settings, a Recycle Bin for deleted items).
What Is a Ribbon?
What Is a Personal Site?
A personal site is
a site that belongs to a specific user and is used to show user information
that belongs, personally, to that user. The user can upload documents to a
personal document library in the personal site, and only that user will be able
to see and manage these documents. The personal site is also a place where
users can manage their personal favorite items and comments that they have
tagged throughout SharePoint or even outside SharePoint (see “What Is Tagging?”
later in this chapter). The personal site has special pages with information
that might be important to track. A user can track information by using
news feeds that tell you what your colleagues are up to. In addition, users can
run searches and stay up-to-date on those subjects. In addition, the personal
site is usually the place from which users can modify their personal details in
the corporate directory.
A personal site usually has components that display information targeted specifically to that user. For example, it might have components that show the user’s e-mail, or upcoming meetings from the person’s calendar, and a list of documents the user has recently worked on and tasks assigned to the user.
A personal site usually has components that display information targeted specifically to that user. For example, it might have components that show the user’s e-mail, or upcoming meetings from the person’s calendar, and a list of documents the user has recently worked on and tasks assigned to the user.
What Is a Ribbon?
As part of the
Microsoft Office product family, SharePoint 2010 uses a design concept called a
ribbon to display different menus and buttons, depending on what you are
looking at. It is important to know how to use the ribbon so you can move
around in a site and perform actions in it.
What Is a List?
A
SharePoint list is a container for information, similar to a very simple
database or spreadsheet. Using a list is the most common way to manage
information in a SharePoint site.
In a list, data is gathered in rows, and each row is
known as a list item. A list can have multiple columns—also known
as properties,fields, or metadata. So a list item is a row with data in those columns.
- First Name
- Last Name
- Company
- Phone
- First Name: John
- Last Name: Doe
- Company: Extelligent
Design
- Phone: 1800-000-000
Lists can be used in many cases. For example, you
might use lists for links, tasks, discussions, announcements, or events. In
SharePoint, users can create lists and columns. Lists can be used for almost anything
that can be described by a group of columns.
Different
lists can have different security settings. For example, list managers can
define who is allowed to add items to a list, who is allowed to edit items, who
is allowed to read the items, and so on. Similarly, each list item can have its
own security settings, so different list items can be visible to different
people. For example, an item that is a link to a restricted site can have
security settings that prevent users who don’t have access to that site from
seeing it.
In some lists, you can attach files to list items—very
much like attachments in e-mail. For example, in a contacts list, you could
attach to each contact a picture and a resume. Or in a list of tasks, you might
attach documentation of what needs to be done to the task.
What Is an External List?
An external list is unlike other SharePoint lists.
Strictly speaking, it is not a SharePoint list at all because it doesn’t store
information inside it. An external list is a view on external data—that is,
data that is contained not within SharePoint but in external databases and
systems.When you add external lists to SharePoint sites,
they are displayed in an interface that looks almost exactly like a regular
SharePoint list. An external list also allows most of the same interactions
with the items in the list that are offered with a regular SharePoint list.
What Is a Document Library?
A document library a special instance of a list, in
which every list item is a file, as shown in Figure 1.8. Files can be Microsoft Office documents, Adobe Acrobat documents (PDF
files), or any other type of file that the system administrator allows.
Most of the attributes of lists exist in document
libraries. In fact, lists and documents libraries are similar in many ways.
However, each item in a document library is a file. Therefore, when creating a
new item in a document library, you need to either upload a file or create one.
Additionally, unlike in lists, in document libraries,
each row can hold only one file. There isn’t an option to attach more files to
the row. Essentially, the file itself is the row. Also, because a file can be downloaded, visitors to
document libraries have different options available to them when browsing a
document library than they have with lists. Several special document libraries templates are
available in SharePoint. These templates are designed for specific types of
content, but they are essentially document libraries.
A wiki page library is a special instance of a document library that is
designed to store web pages. On those web pages, you can display different
types of content—text, images, videos, and web parts.
What Is a Wiki Page Library?
What Is a Form Library?
A form
library is much like a document library, but it is supposed to host only
Microsoft InfoPath forms. Microsoft InfoPath is electronic form-creation software
that integrates with SharePoint. Forms created with InfoPath can be published
to SharePoint form libraries, and users can then fill out these forms.
With
SharePoint Server, you can load some InfoPath forms without having Microsoft
InfoPath installed on your machine. In this case, the form opens in a browser,
as a web form. If you have a program that can edit InfoPath forms, such as
Microsoft InfoPath 2007 or Microsoft InfoPath Filler 2010, the form opens in
that program.
A Calendar view shows the items in a list based on dates that are set on
the items. Other views include the Gantt view and the Datasheet view. The Gantt
view is similar to the Calendar view: It shows information based on dates in
the list items’ properties. The Datasheet view is a Microsoft Excel–like view
that allows copying and pasting of data into the list or library.
For example, to show on the home page of a site the contents of a list
of links, you can use a web part that displays the content of a list.


What is List and Document Library:


Managing Security


Solution
for Site Managers....


Sandboxed Solutions versus Farm Solutions:
What Is an Asset Library?
An
asset library is a special instance of a document library that is specially
designed to store digital assets such as images, audio files, and videos.
This
kind of library (shown in Figure 1.9) can be used as a repository for media
files that will be used throughout the SharePoint environment—for example,
corporate logos, training videos, and podcasts.
A picture library is a special type of a document library that is
dedicated to images. A picture library is useful for sharing photos with other
people. For example, you can have a picture library as your stock photo
repository
What Is a Slide Library?
A
slide library is a special type of library that has features not available in
other types. This library type (shown in Figure 1.10) is designed to help
people in an organization collaborate to create PowerPoint presentations by
sharing slides. One user can allow other users to import those slides into
their presentations.
What Is a Picture Library?
What Is a View?
Using
views is a useful way for a list manager to create different ways to show the
information in a list or library. Different views may show different columns
and have different sorting and filtering, grouping, and styles.
In
SharePoint, views can be either public or private:
Public—
The list’s or library’s managers create public views, and these views are
available to anyone to use.
Private—
Users create private views. Only the user who created a private view can use
that view. You may, for example, create a private view and customize it to show
the information that you usually need to find the items or files that you
usually work with.
There
are several types of views in SharePoint. Most of the views that you will see
are the standard tabular views that resemble printed worksheets—with column
headers and values in rows but no ability to edit the data directly. However,
some special view styles show the information in the list in different ways.
For example, the Datasheet view allows directly editing the data, and a
Calendar view shows items as part of a calendar.
What Are Web Parts?
Web
parts are the building blocks of pages in SharePoint. They are components that show
data, and they can be placed in certain regions of a page—known as web part
zones. A page can hold many web parts, in different zones or in the same zone.
They may be one under another in some zones and side-by-side in other zones.
What Are Alerts?
Using alerts is a
great way to be notified by e-mail of changes in lists and libraries or even
specific documents or list items.
SharePoint has a
built-in alert mechanism that enables users to register for different kinds of
alerts. Basically, a user selects the piece of content she wants to be alerted
on and requests that SharePoint send her an e-mail when that content changes.
For example, you
might use alerts with a document library that is supposed to have documents
regarding a specific topic. You might want to know immediately when a new
document is added to that document library (see Figure 1.24). As another
example, you might want to know when a particular policy document is changed
(for example, the corporate travel policy might be very important to people who
travel a lot). Alerts enable you to request to be notified when changes like
these occur.
What Is a Site Column?
A site column is a
column for a list or a document library that can be used in all document
libraries or lists in the site in which it is created, as well as in the
subsites for that site.
A site manager can
define a specific column of data once and manage it from a central location
instead of creating that column many times in many lists and libraries. In
addition, content types can only use site columns. (In lists and libraries, on
the other hand, columns can be created separately.)
What Is a Content Type?
As mentioned
earlier in this chapter, lists and document libraries can store different kinds
of content, known as content types. A site manager can create and manage the
content types in a site. The content types are then available in that site and
in all the sites under it. The different types of content may have different
site columns and/or different settings, such as policies and workflows,
associated with them. Content types can
use site columns only for column definitions. This means that to create a
content type, you must choose what site columns should be included in that
content type.
A simple example of
a content type is a list of contacts that stores two types of contacts—an
internal contact and an external contact. The Internal Contact content type is
used for a contact inside the company—and as such does not need the company
property because all internal contacts are from the same company. However, the
External Contact content type does require the company property because every
contact may be from a different company. Hence, a single list has two different
column requirements.
As another example
of the use of content types, consider a document library where you store many
different types of documents. Some documents are presentations, and some are
financial reports, while others are user guides and product whitepapers. The
differences between those content types are possibly more than just different
columns: The content types can also specify different templates that users
should use when creating documents of these types. For example, when creating a
presentation, a Microsoft PowerPoint template will be used. When creating a
financial report, a user will get a specific Microsoft Excel workbook as a
template from which to start. User guides may be from a certain Microsoft Word
template, while product whitepapers may be PDF documents. Some of these
examples are shown in Figure 1.25, which shows the content type options for
creating a new document in a document library.
What Is Tagging?
Tagging is a social
web mechanism available in Microsoft SharePoint 2010 Server (not in SPF) that
enables you as the user to tag a document or a list item or a even a page—in
the SharePoint site or outside it. You can tag
something to help remember it and find it more easily later on.
One tag that
SharePoint comes with is the I Like It tag. This tag enables you to signify
that you like a document or a page, and then other people can see that you
liked it. You can easily find that document or page again by looking at the
list of items you’ve tagged as things you like (usually from your personal
site). Tagging isn’t
limited to I Like It, however. You can add new tags as shown in Figure 1.26,
and you can remove and rename tags. Depending on what the tag manager configured
for the site, you might be able to tag objects in your site under different
tags.
For example, the most common workflows for
documents are review and approval. Some important documents (for example,
contracts) need to go through several steps of approval from different people
before they can be officially considered final and published.
What Is Managed Metadata?
Available only
through Microsoft SharePoint 2010 Server (not SPF), managed metadata is a
mechanism that enables administrators to create hierarchical term sets that can
then be used in document libraries and lists as columns.
A term set is
similar to a list that contains items, except that these items can contain more
items under them in a hierarchy. For example, if you have a term set called
Products, you could have a term for each product that you have in the
organization.
What Are Versions?
Document libraries
and lists in SharePoint have an option to track versions. This option stores
old versions of files or items each time a change is made. For example, if a
user uploads a document, and then another user edits the document and saves it,
SharePoint saves the original document as a version of the file. Later, users
can look at the version history of the file and choose to open a specific
version or restore it (that is, make that version the current one).
SharePoint supports
two types of versioning. In the first type, each change is regarded as a major
change, and the version numbers go from 1 (the first time a document was
uploaded) to 2 (after the first change) and then 3 and 4 and so on as shown in
Figure 1.28. In the second type, each change is regarded as a minor change,
unless the user specifies that it is a major one. The version numbers go from
0.1 (the first time a document was uploaded) to 0.2 (the first change) and so
on, until a user selects the option to perform a major change, and the version
number changes to 1.0, and subsequent changes raise it to 1.1, 1.2, and so on.
What Is a Workflow?
In SharePoint, a
workflow is a series of steps—some automatic, some manual—that must be
performed as part of a business process for a document or a list item.
Finding
Your Way Around a SharePoint Site
Log
On with Different Credentials and Signout:

Use
the Ribbon:

Change the Regional Settings:


Navigate
Through a SharePoint Site:

What is List and Document Library:


What is List and Document Library:

Tag a
Document, List Item, or Page:

View
Past Versions of documents:

Social Features in Sharepoint:

Solution For Authors And Content Managers....
Check In and Check Out a
File or List Item:


Restore an Earlier Version
of a File or List Item:

Approve or Reject a File
or List Item:

See What Files or List
Items Are Waiting for Your Approval:

Create list and document
libraries:

Create new document
library:

Add a column to a list or
Document library:

Add a Site column to a
list or Document library:

Change and Remove a column
in list or Document library:

Change the document
template when new button press:

Add a content type to list
or document library:


Site Columns and Content
Types:

Web parts Implementation:

Create a Personal or
Public View for a List or Library:


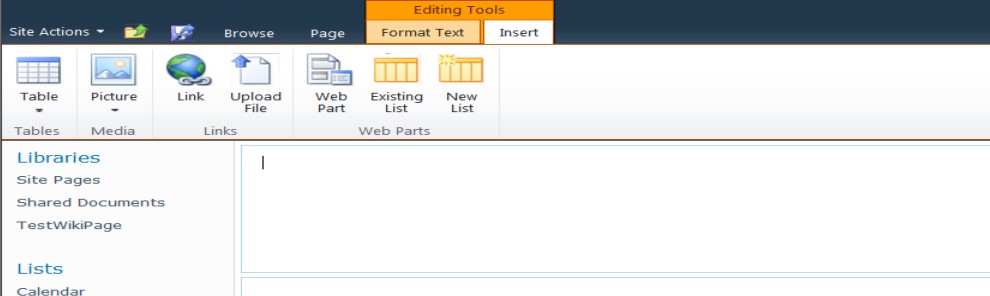
Authoring Page in
SharePoint:
Create a New Page

Edit the content of the
page

Change the Page Layout of
a Publishing Page

Add a Hyperlink
Add a Picture

Use Wiki Syntax to Link to
Existing Content and Create Pages
To link to existing content while typing text in a wiki page, type [[. This opens a popup menu that shows a list of existing pages available in the site (see Figure 9.26). To link to one of these pages, simply select it from the menu and add ]]. The item is added to the text as [[pagename]], and when you save the document, this is transformed into a link to that page.

Add a Web Part

Modify a Web Part

Reuse a Web Part

Discard the Checkout of
the page

Compare versions of a page

Managing Security
See What Permissions Are
Set:

Check Permissions of User
and Group:

Grant Permissions on a
list or library:

See who is member of SharePoint Group:

Workflow in SharePoint:
Start Workflow in SharePoint:

In the Add a Workflow page, you can define what workflow you want to create on the list or library by selecting from the workflow box that lists the available workflows. By
default, the only workflows available in SharePoint Server are the five built-in workflows:
. Disposition Approval—Allows starting a workflow to manage document expiration and retention. As part of the workflow, people involved with the file or list item are required to decide whether to retain or delete expired documents.
. Three-State—Tracks the progress of approval of a document or a list item through three states: Active, Ready for Review, and Complete.
. Collect Feedback—Allows starting a review workflow for a document or list item in the list or library. Reviewers can provide feedback, which is compiled and sent to the owner of the file or list item when the workflow has completed.
. Approval—Allows starting an approval workflow on the list’s or library’s items, where approvers can approve or reject the document or list item, reassign the approval task, or request changes to the document.
. Collect Signatures—Allows starting a workflow for collecting signatures that are required to complete a business process on a document. Note that this workflow can be started only from within a Microsoft Word 2007 or Microsoft Excel 2007 client, and then only from certain versions of Microsoft Office 2007 (Ultimate, Professional Plus, and Enterprise). If you cannot start this workflow from your Microsoft Office client, you should check the version of your Microsoft Office and upgrade if necessary.
Track progress of Workflow
in SharePoint:

Associate a workflow with
a List or Library:

Solution
for Site Managers....
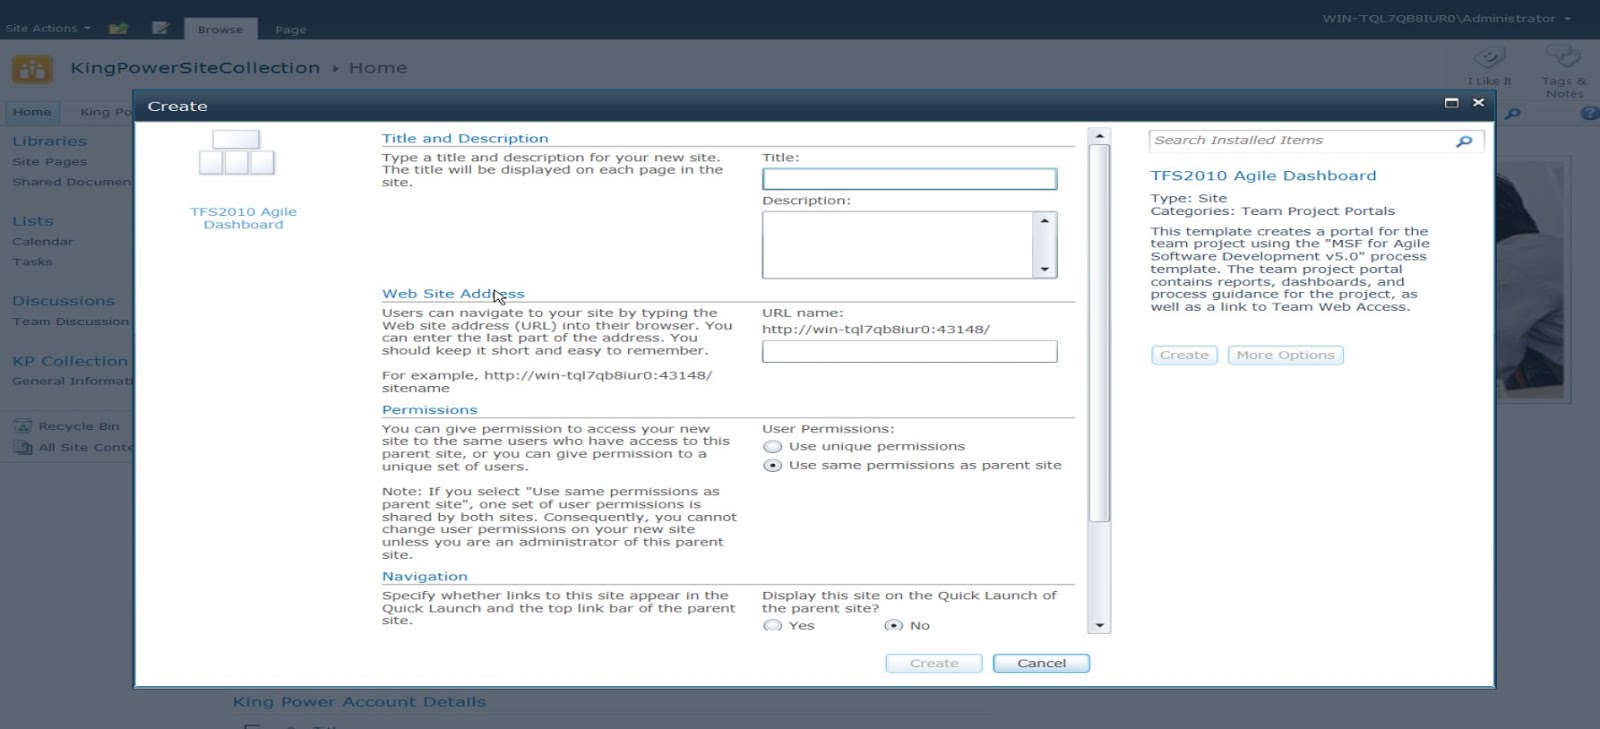
Create a Subsite:

If you click on “More Options” button it will open
below screen where we could enter information for new Website.
Create an Event with a
WebSite:


Customizing a SharePoint Site
Open the site setting page:


Managing Site Security
Get to a Site’s
Permission Management Page:


Create SharePoint group
for Sites:

Edit SharePoint group settings:

Create Permission Levels
for a Site:


SharePoint Architecture for Developers


ASP.NET WEB.Config file in
SharePoint:

ASP.NET Global.asax file in
SharePoint:


Viewing and Creating
Application and Site Pages:


14 Hive which holds App and
Site pages:

SharePoint Development Fundamentals
Development in
SharePoint is an interesting hybrid of several Microsoft technologies and
styles of development. For example, when you build a custom web part or custom
application page in SharePoint, it will feel very similar to creating a web
part or web page with ASP.NET. This may make you think that SharePoint
development is just like ASP.NET development. But just when you are feeling
confident, you hit the barrier of packaging and deployment. To deploy that web
part or web page, you will have to use SharePoint’s packaging and deployment
system, which is a system that uses custom XML files to define what SharePoint
calls “features.” Those features are packaged with their associated files into
a .WSP file (basically a CAB file renamed to .WSP). Finally, you must run a
command line tool on the SharePoint server to process the WSP file and install
the web part or web page.
If you want to
customize the behavior of a SharePoint list, development in SharePoint begins
to feel more like the customization of a rich client application such as
Office. You create a .NET assembly that handles a set of events raised by a
particular SharePoint list. You interact with SharePoint’s object model much
like Office customizations interact with the Office object model. Then you use
SharePoint’s packaging and deployment system to install your .NET assembly.
If you want to create a custom SharePoint list,
a custom content type, or a site definition, development in SharePoint begins
to feel like declarative programming. SharePoint has a custom XML language
called CAML, which is used to define key objects such as lists, columns, and
content types.
If you want to develop
custom workflows in SharePoint, another Microsoft technology must be
learned—the Windows Workflow Foundation. SharePoint’s workflow features are
often used to automate workflow that people participate in for items in a list
or even workflow that occurs at a site level. If you have worked with workflow,
this will feel familiar to you—it is yet another style of development used
within SharePoint. Typically your workflow also interacts with the SharePoint
object model to get interesting things to happen.
SharePoint can feel
like ASP.NET at times, like event-driven customizations at other times, like
declarative programming, like workflow programming, and like code focused on
automating an object model at other times. This can make SharePoint programming
difficult—you have to get comfortable with many styles of programming to get
interesting things done.
SharePoint Setup Instructions:


A Visual Studio View of
SharePoint: The Server Explorer
We’ve now seen a
view of SharePoint content and settings through the lens of what you can do in
SharePoint in the web user interface. We’ve also seen a view of SharePoint
through the lens of the Site Administration tools. Our final view of SharePoint
for this chapter will be through the lens of Visual Studio. We will use Visual
Studio to take a closer look at the top-level site that was created when
SharePoint was installed as well as the new child site and content we have
created in this chapter.
The SharePoint
features in Visual Studio require administrator privileges so Visual Studio
must be run as an administrator. To launch Visual Studio as an administrator,
locate the “Microsoft Visual Studio 2010” shortcut in the Start menu under All
Programs > Microsoft Visual Studio 2010. Right click on the Microsoft Visual
Studio 2010 shortcut. You can choose “Run as administrator” from the context
menu that appears to run Visual Studio as an administrator.
Alternatively, if
you just want to make Visual Studio start up with administrator privileges
every time you launch it, you can change the Microsoft Visual Studio 2010
shortcut properties to always run as administrator. To do this, right click on
the Microsoft Visual Studio 2010 shortcut and choose Properties. Click the
Compatibility tab as shown in Figure 1-70. Then check the “Run this program as an
administrator” check box and press OK.
Now use the
modified Microsoft Visual Studio 2010 shortcut or the “Run as administrator”
command in the context menu to launch Visual Studio with administrator
privileges. Once Visual Studio starts, use the View menu and choose Server
Explorer to show the Server Explorer window. Visual Studio 2010 lets you browse
the structure of a SharePoint site using the Server Explorer window. Expand the
SharePoint Connections node and expand the subnode under that to see the contents
of the SharePoint server on your developer machine as shown in Figure 1-71. In
Figure 1-71 we have also expanded the Sites subnode to show the child site we
created called “My Child Site.” The Sites subnode shows any child sites for the
SharePoint sites.
Visual Studio’s
Server Explorer view surfaces a lot of the content and structure of a
SharePoint site that is of interest to a developer. Consider the nodes under
the Team Site node (our top-level site in our site collection). There are seven
subnodes displayed by Visual Studio: ContentTypes, Features, List Templates,
Lists and Libraries, Sites, Workflow Associations, and Workflow Templates.
We’ve already seen the Sites subnode in Figure 1-71. Let’s consider the rest of
these subnodes in turn.
ContentTypes:
Visual Studio
displays all the 52 content types that are installed by default on a SharePoint
site as shown in Figure 1-72. Figure 1-73 shows the properties window that is
displayed when you select one of the content types in Server Explorer. If the
Properties window isn’t visible, use the View menu to display the Properties
window. The Properties window shows key properties of the content type. Note
that the properties in the Properties window are all read-only, you can’t
directly modify the server with the server explorer. Also, when you expand the
content type in Server Explorer, you will be able to see the fields associated
with the content type as shown in Figure 1-74.
Features:
The next sub node
displayed in the Server Explorer under the SharePoint site is the Features
node. If you expand this node, you can see all 33 features that are installed
in the SharePoint site by default as shown in Figure 1-75. You can see by this
list that SharePoint features aren’t just created by third-party developers—the
implementation of SharePoint itself uses features built into the system. This
is extremely useful as you learn SharePoint development because you can look at
the features that are part of a standard SharePoint installation and learn how
to build your own features. As before, when you click on a feature node in the
Server Explorer, the Properties window shows additional information about the
node as shown in Figure 1-76. In this case, one interesting property to point
out is the FeatureDefinitionScope property that shows that the Announcement
Lists feature is defined at the Farm level, which means it is available to
sites running in the farm.
List Templates:
The next subnode
displayed in Server Explorer is the List Templates node as shown in Figure
1-77. Below the node are the various list templates that are installed in the
SharePoint site. These templates can be used to create new lists. Figure 1-78
shows the Properties window that is displayed for the Announcements list
template. In this case, an interesting property to point out is the FeatureId
property. This indicates that the list template was installed as part of a
feature. If you compare the DefinitionId property for the Announcements Lists
feature in Figure 1-76 with the FeatureId property in Figure 1-78 you can see
that it matches. This lets you know that the Announcements list template was
installed by the Announcements Lists feature as you might expect.
Lists and Libraries:
The Server Explorer
also shows the lists and libraries that have been created in a SharePoint site.
If you expand the Lists and Libraries subnode under the SharePoint site, you
will see the Document Libraries subnode with document libraries below it and
the Lists subnode with lists below it. This view shows not only the Shared
Documents library but also all the galleries as document libraries (Figure
1-79)—the Galleries we have seen in this chapter are really just special
document libraries. It also shows the lists that are created by default in a
SharePoint site. When you expand a document library or list, you can see
additional nodes associated with the list or library. In Figure 1-80, you can
see the fields associated with the Announcements list. You can also see that
there are two Views associated with the list and no Workflow Associations have
been made with the list.
Workflow Associations and Templates:
Figure 1-81 shows
the final two subnodes in the Server Explorer. The Workflow Associations node
shows any workflow associations that have been made in the site. The Workflow
Templates node shows any workflow templates that are installed in the site. We
will consider workflow in more detail in Chapter 8, “SharePoint Workflow.”
Introduction SharePoint development in VS 2010

Introduction SharePoint development in VS 2010

Table
2-1. SharePoint Project Types
|
|
Project
Type
|
Description
|
Empty
SharePoint Project
|
|
Visual
Web Part
|
|
A SharePoint project prepopulated with a
Sequential Workflow project item; when you create a workflow, you are writing
a program that is structured as a multistep process that may be long running,
waiting for humans or external systems to complete tasks or other processes
before continuing. A sequential workflow proceeds in a linear top-to-bottom
fashion.
|
|
Business
Data Connectivity Model
|
|
Event
Receiver
|
|
List
Definition
|
A SharePoint project
prepopulated with a List Definition project item; a list definition defines
the schema of a list along with other things that define the list, such as
views and forms used by the list.
|
Content
Type
|
A SharePoint project
prepopulated with a Content Type project item; a content type defines the
schema for an item in a list—examples of content types in SharePoint include
the Contact content type and the Announcement content type. Content types can
also be associated with document libraries, allowing you to create a
specialized document type, such as an expense report content type complete with
a document template, such as an Excel workbook or Word document, to be used
when a new expense report is created.
|
Module
|
A
SharePoint project prepopulated with a Module project item; a module is used
when creating deployments to provision the SharePoint site with one or more
files that are needed by a solution—for example, you might use this to deploy
a custom document to a document library or some other custom resource like an
image file or an application page.
|
Site
Definition
|
A SharePoint project prepopulated
with a Site Definition project item; a site definition is a template that is
used when creating a new SharePoint site and defines all the initial content
in that site—for example, the subsites that we saw in Chapter 1, Table 1-7 are all backed by custom site definitions.
|
Import
Reusable Workflow
|
|
Table
2-3. SharePoint Project Item Types
|
||
Description
|
||
Application
Page
|
||
Business
Data Connectivity Model
|
||
Content
Type
|
A content type defines the schema for an item in a
list—examples of content types in SharePoint include the Contact content type
and the Announcement content type. Content types can also be associated with
document libraries, allowing you to create a specialized document type such
as an “Expense Report” content type complete
with a document template (e.g., an Excel workbook or Word document) to be
used when a new expense report is created.
|
|
Empty
Element
|
An
empty element is used to create a SharePoint project item that has a single
XML file called Elements.xml associated with it. In this file you can define
SharePoint elements that aren’t natively supported yet by Visual Studio, such
as a site column for a list. This element can then be referenced by other
project items and installed with the rest of the solution.
|
|
Event
Receiver
|
||
List
Definition
|
A list definition defines the
schema of a list along with other things that define the list, such as views
and forms used by the list.
|
|
List
Definition from Content Type
|
||
List
Instance
|
||
Module
|
A module is used when creating deployments to
provision the SharePoint site with one or more files that are needed by a solution—for example, you might
use this to deploy a custom document to a document library or some other
custom resource (e.g., an image file or an application page). A module has an
Elements.xml file that you can edit to specify the file or files associated
with the module.
|
|
Sequential
Workflow
|
||
State
Machine Workflow
|
||
User
Control
|
||
Visual
Web Part
|
||
Web
Part
|
||
Sandboxed Solutions versus Farm Solutions:
Early
in the project creation process, Visual Studio asks you to decide between using
a sandboxed solution or a farm solution. It is worth considering in more detail
the difference between a sandboxed solution and a farm solution and when to
choose one over the other.
Prior to SharePoint 2010, all solutions you could
create were farm solutions. In Chapter 1 we
saw that SharePoint solutions are deployed to a farm that could consist of one
to many servers. Each server in the farm can have multiple web applications
running on it. A web application can in turn have one or more site collections,
and a site collection has one or more sites. Farm solutions can impact the
entire SharePoint system and are available to all site collections and sites in
the farm. This is sometimes desirable, but sometimes can have undesired effects
because a farm solution that is misbehaving can impact all sites and site
collections in the system.
In SharePoint 2010, you can create a new type of solution called a
sandboxed solution. Sandboxed solutions are deployed at the site collection
level rather than the farm level, so this lets you isolate a solution so it is
only available to one site collection within the farm. Sandboxed solutions also
run in a separate process from the main SharePoint IIS web application process,
and the separate process is throttled and monitored with quotas to protect the
SharePoint site from becoming unresponsive due to a misbehaving sandboxed
solution.
It is worth mentioning that sandboxed solutions solve
an organizational problem as well—in many organizations it is difficult to get
permission to install a farm solution because of the possible impact that could
have on the SharePoint system. System administrators in charge of running a
SharePoint site have been reluctant in the past to allow custom solutions to
run on their sites. With the advent of SharePoint 2010, there is now a robust
system in place to monitor and throttle these custom solutions so that system
administrators don’t have to worry about a custom solution bringing the entire
SharePoint site down. In addition, with sandboxed solutions, users can upload
solutions without requiring administrator approval.
Mapped
Folders, Deployment, and the Hive:
Mapped folders give you a way to take resources and
other files in your project and add them to folders in the Visual Studio
project that are mapped to file system locations where those files need to be
deployed on the SharePoint server. For example, imagine you have an application
page you have developed that needs to deploy a file to the SharePoint server’s
images folder. To do this you would right click on the Project node and choose
Add, then SharePoint Images Folder. This creates a mapped folder in the project
called Images. Any folders you add to the images folder will be created on disk
(if they aren’t already there) and the contents of those folders will be copied
to the SharePoint server’s images folder when the project is deployed.
It is time for another aside regarding SharePoint terminology. We’ve
just implied that SharePoint has an images folder—what is this and what other
special folders does SharePoint have? When you build a deployment for
SharePoint you build a SharePoint package, which is basically a CAB file (like
a ZIP file if you aren’t familiar with the CAB format) that has in it a set of
files and instructions that are used to install your SharePoint solution. The
instructions are encapsulated in one or more SharePoint Feature files, which
consist of XML markup that is read at install time. A special program called
stsadm.exe takes the SharePoint package file (which is a CAB file with a .WSP
extension) and reads the SharePoint feature files in the package to determine
how to install the SharePoint solution. These SharePoint feature files in turn
can refer to additional files that are packaged within the SharePoint package.
Stsadm.exe then does two major things—it adds information to the SharePoint
content database and it copies files to the file system. So a SharePoint
solution typically modifies the SharePoint content and configuration databases
and adds files to the file system of the SharePoint server machine.
There
are three general locations where SharePoint copies files to the file system of
the server during deployment.
The first location is the global assembly cache of the server machine. Solutions that have assemblies that need full trust will copy to this directory when Assembly Deployment Target is set to GlobalAssemblyCache
The first location is the global assembly cache of the server machine. Solutions that have assemblies that need full trust will copy to this directory when Assembly Deployment Target is set to GlobalAssemblyCache
The second location is directories specific to a web application.
One of those web application-specific directories is the bin directory. This is
where assemblies are deployed if you set the Assembly Deployment Target
property to WebApplication. To determine where the web application directory
is, launch the Internet Information Services (IIS) manager on the SharePoint
server (use the search box in the Start menu to search for it). Once you’ve
launched the IIS manager, expand the Sites folder and find the web application
you are interested in—in a default install it will be called SharePoint -80.
Right click on the SharePoint -80 node, and pick Explore from the context menu.
This will open the base directory for your web application.
Of interest here are several directories and files you may use. The web.config
file is used to configure ASP.NET specific settings—you have to modify this
file for some SharePoint development scenarios we will see later in this book.
The bin folder is the bin directory associated with the web application where
assemblies are sometimes deployed. There are other directories here that are
used for web part development, such as the wpresources folder.
The third location of interest for deployment is known
in the SharePoint developer world as the hive, which is the location on disk where SharePoint
installs feature definitions, site definitions, and other content used to
provision the web site. SharePoint builds on its own extensibility model—many
of the features in the SharePoint web site correspond to actual files you can
inspect and learn from in these directories. The hive can be found at Program
Files\Common Files\Microsoft Shared\Web Server Extensions\14
When
you add a mapped folder in Visual Studio by right clicking on the Project node
and choosing Add, then SharePoint Mapped Folder which
lets you view all the folders in the hive to which you might want to deploy
items. We have expanded the TEMPLATE folder, which is the main place to which you will
deploy items. In this folder, you can see there is an IMAGES folder, where you
can deploy arbitrary images you want to use from web parts or application
pages. There are other directories as well—for example, the SiteTemplates
folder, where you install Site Definitions files and the LAYOUTS folder, where
you can find the master page being used for the SharePoint server. You will
typically create a subdirectory within the LAYOUTS folder if you want to
install your own application pages.

Format of the Elements.xml File:
The first file to consider is the Elements.xml file. This is sometimes referred to as an Element Manifest file, and is an XML file that contains information that describes the SharePoint item being created to SharePoint, in this case an event receiver. Behind the scenes, Visual Studio will refer to this Elements.xml file in a feature file it has created. The feature file in turn is contained by a package—a package can contain one or more features. When Visual Studio deploys the package, each feature file and associated Elements.xml file will be copied to the SharePoint server. SharePoint will read the feature file that will refer to the Elements.xml file. The Elements.xml file, as we will see, in turn refers to event handlers defined in an assembly. Once SharePoint has read the feature file and associated Elements.xml and assembly files, it can make the feature available for activation in the SharePoint site. We will consider the Visual Studio project support for features and packages in more detail later in this chapter, “Packaging and Deployment.” Note that in this diagram, one feature has custom code associated with it represented by a .NET assembly. It is possible for multiple features to use code written within the same assembly.

Features and Packages in a Visual Studio Project
We’ve
now explored the properties and files that are associated with a new SharePoint
project item. We’ve seen the Elements.xml file, the code file associated with
an event receiver, and the properties associated with each of these files and
the root EventReceiver1 folder for the SharePoint project item.
You may have noticed that when we added the event
receiver project item to our blank solution, some new items appeared under the
Features folder. Let’s examine the Features and Package folders in the
SharePoint project to start to get an idea of what Visual Studio does to
package and deploy our SharePoint solution.
Just to make things a little more interesting, let’s
create a second event receiver. Follow the steps we did earlier in the chapter
to create a second event receiver called EventReceiver2. For the second event
receiver, choose List Item Events as the type of event receiver to create, use
Calendar as the event source, and handle the event when an item is being added.
Now double click on the project item called Feature1
under the Features folder. The Visual Studio Feature designer appears.
Note that we now have two event receivers in our solution, EventReceiver1 and
EventReceiver2, and Feature1 is configured to install both event receivers.
It is
possible to add features to the Features folder. For example, maybe you want
EventReceiver1 and EventReceiver2 to be deployed as separate features. You
could create a separate feature called “Feature2” and install EventReceiver1 in
Feature1 and EventReceiver2 in Feature2. Doing this would enable the event
receivers to be installed and uninstalled separately. Another reason you might
need to have separate features is when you have SharePoint project items you
want to deploy that need to be installed at a different scope. If you drop down
the Scope drop-down,
you can see that a feature can be installed to one of four scopes: Farm, Site
(the Site Collection Level), Web (the Site level), and WebApplication (all
sites hosted by an IIS web application). Due to historical reasons, SharePoint
sometimes uses the word Site to refer to a Site Collection and Web to refer to
a SharePoint Site.
Let’s create a second feature by right clicking on the
Features folder and choosing Add Feature. A new Feature called Feature2 is
created. In the Feature designer that will appear for Feature2, click on the
EventReceiver2 SharePoint item and click the > button to move the feature
from the left-hand list to the right-hand list. Then back in the Feature1
designer, ensure that EventReceiver2 is not installed by Feature1 by clicking
on EventReceiver2 and pressing the < button to move it from the right-hand
list to the left-hand list. The resulting Feature1 designer is shown.
This shows that Feature1 will now install only EventReceiver1 not
EventReceiver2. The right-hand list contains the features that will be
installed; the left-hand list contains other items in the solution that have
not been added to this feature.
The Files outline shows the actual files that will be
included in the feature to install the associated SharePoint project item. In
this case, you can see that the Elements.xml file will be included. The
assembly built with the current project is also implicitly included in the
feature, even though it doesn’t show in this designer.Also, at the bottom of the dialog you can now see the Feature Activation
Dependencies area of the Feature designer. Here you can add dependencies that
your feature has on other features in the solution or on other features that
must be installed in advance to the SharePoint site where this feature will be
installed. For example, you might have a situation in which you’ve created two
features in your solution but Feature1 needs Feature2 to be installed first.
Let’s enforce this constraint. Click the Add... button in the Feature
Activation Dependencies area for Feature1 to specify that Feature2 is a
dependency. When you click the Add... button, . If you click the
feature SharePointProject1.Feature2 and then press the Add button, Feature2
will be added to the list of Feature Activation Dependencies for Feature1.
You
also might want to add a dependency on another custom or built-in SharePoint
feature. For example, you might need to ensure that the Announcement Lists
feature is installed on the SharePoint site because your event receiver
modifies or creates announcement lists. If announcement lists are not there,
your event receiver will fail. lets you add dependencies to
SharePoint features not in your solution by specifying the Feature ID of the
feature on which you are dependent. you can use the Server Explorer and the Properties window to determine
the Feature ID for a particular feature. This ID could
be added as a custom dependency for our Feature1.
Features in a project are
useless unless they are deployed into what is called a Package or a .WSP file.
Visual Studio helps you configure the Package created by your solution with the
Package Designer. To see the Package Designer, double click on the
Package.package project item under the Package folder in your solution.
When
you first open the designer it won’t exactly because Visual Studio
will automatically place both features we created into the items to install in
the package that is created by the project. We used the < button to remove
Feature2 from the package because we don’t really want to install
EventReceiver2 since we have no code added to it yet. Each project can build
only one package, but you can have a package created by other projects in your
solution. Visual Studio also lets you mix and match where features come
from—that is, a feature can come from Project1 in a solution but be installed
by the Package built by Project2. If you
click on the Advanced button at the bottom of the Package Designer, options are
provided to add additional assemblies to the package—either assemblies created
by other projects in the solution or additional external assemblies.
Building:
So we now have a SharePoint solution with two event
receivers: EventReceiver1 and EventReceiver2, two features: Feature1 and
Feature2, and one package: Package.package. Feature1 includes EventReceiver1,
Feature2 includes EventReceiver2, but Package.package only includes Feature1,
so the EventReceiver2 will not be packaged or installed. If we build currently,
we will get a missing dependency error because we made Feature2 a dependency
for Feature1 and Feature2 is not currently being packaged. Use the Feature
designer’s Feature Activation Dependencies area for Feature1 to remove the
dependency on Feature2 by clicking the Remover button.
We are now ready to build our project in preparation
for running and debugging it. When you build the project by choosing Build
Solution from the Build menu, the Output window indicates pretty much what you
would expect—it says that a DLL has been built in the Debug folder of your
project called SharePointProject1.dll. When we go to the bin\debug directory
for the project in Windows Explorer, you will see the DLL and the PDB for the
DLL, which contains debugging information. If you package the project by
choosing Package from the Build menu, you will see something a little
different.
You will now find in addition to the DLL and PDB files, there is a .WSP file.
This is the SharePoint package file that the Feature and Package Designer
helped us to create.
Let’s look at the .WSP file in a little more detail.
Click the SharePointProject1.wsp file in the bin\debug folder of your project.
Copy the SharePointProject1.wsp then Paste to make a copy of the .WSP file.
Rename its extension from .WSP to
.CAB. Remember we said that a .WSP file was actually a .CAB file? Now that
we’ve renamed it to a .CAB file, you should be able to double click on it and
see the contents of the .WSP file.
As you can see, there are 4 files inside the .WSP file: Elements.xml,
Feature.xml, manifest.xml, and the assembly created by our project (a copy of
the one we saw in the debug directory). Let’s look at the contents of these
files briefly. Drag Elements.xml, Feature.xml, and manifest.xml out of the
renamed .CAB file to your desktop.
Manifest.xml
is shown and
is the top-level manifest for the .WSP file. It tells about any assemblies
included in the package (in this case SharePointProject1.dll). Additional
assemblies could be included if you use the Advanced page of the Package Designer
to add additional project or external assemblies. Manifest.xml also lists any
features contained in the Package, in this case Feature1. You can see what
manifest.xml will look like within Visual Studio by double clicking on the
Package.package project item to show the Package Designer then clicking on the
Manifest button at the bottom of the Package Designer.
Debugging:
Now that we’ve built our
project and created the .WSP file, let’s debug our solution. To debug the
solution, press F5 or choose Run from the Debug menu. Now we see much more
activity in the Output window.
The Build phase does what we saw before—compiles a DLL from any code in the
project and builds a package. Then in Deploy several things of interest happen.
First, there are some steps to Retract the previous version of the solution.
This is so the edit code, run, edit code and run again cycle will work. Visual
Studio automatically removes the package and features you installed on your
last debug session before deploying your updated package to ensure that you
will always have the most recent version of your solution on the server and
that the old one won’t conflict with the new one. You can also manually Retract
a solution from the Server using the Retract command from the Build menu—for
example, if you want to ensure that the Server you were testing on doesn’t have
your solution on it when you are done.
The next thing that Visual Studio does is deploy your
.WSP file to the server—the equivalent of using stsadm.exe on the .WSP file at
the command line. This installs the package, but there is also a second step
after installation called activation. An installed solution is still not active
for the web site. Visual Studio also activates the features in the solution to
ensure they are installed and active on the web site. Visual Studio will also
do an IIS Application Pool recycle if necessary—this ensures that the most
current version of the site is running with your new solution installed on it.
Finally, Visual Studio launches the site URL in a browser window.
SharePoint Development Example 1(ASP.NET):


SharePoint Development Example 1(ASP.NET):
- Open VS 2010 and select SharePoint Empty project template from project types.

- Select SandBox solution method for your deployment.


No comments:
Post a Comment